Eisen, Japan
Eisen Pin Gauge Usage Example
Made in Japan
Manufacturer: Eisen Co., Ltd.
Product name: Pin Gauge Usage Example
In addition to measuring the inner diameter of holes, it has a wide range of applications.
Hole pitch measurement

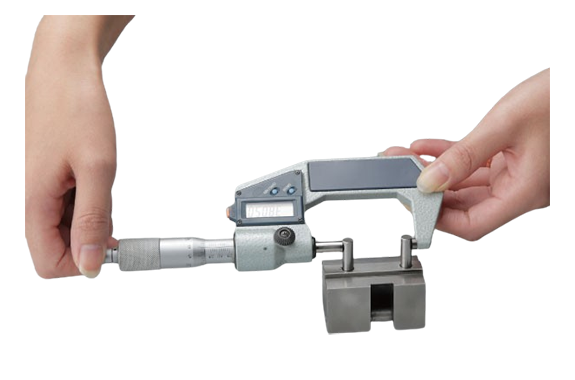
Micrometer Calibration

Groove width measurement

Hole inspection with plug gauge

Dovetail measurement

Engine parts inspection

Gear overpin diameter measurement

Gear runout measurement

Hole position measurement

![]() If you insert a pin gauge of diameters d1 and d2 that fits snugly into the holes in the item, the position of the hole (h1, h2) can be found by measuring H1 and H2 .
If you insert a pin gauge of diameters d1 and d2 that fits snugly into the holes in the item, the position of the hole (h1, h2) can be found by measuring H1 and H2 .
Measuring runout of gear teeth

A pin gauge is inserted into the gear tooth grooves, and the indicator is used to measure the movement of the pin gauge in and out along the tooth grooves for all tooth grooves to determine the runout of the tooth grooves.
Measuring the inclination angle (1)

The inclination angle θ using a sine bar and a pin gauge with diameter d
![]() can be calculated as follows:
can be calculated as follows:
Measuring the inclination angle (2)

By measuring h, the cone angle θ ![]() can be calculated as follows:
can be calculated as follows:
Hole pitch measurement

By inserting pin gauges of diameters d1, d2, and d3 that fit snugly into the holes in the item and measuring L1 and L2, the hole pitch ( ![]() )
) ![]() can be calculated using the following equation.
can be calculated using the following equation.
Measuring the effective diameter of a screw (three-wire method)

The effective diameter E is calculated by E=M-3d+0.866025p
(for metric and unified threads) .

