Eisen, Japan
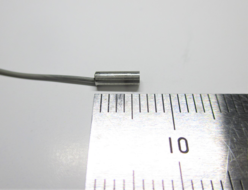
Eisen SPO Series Limit Screw Gauge
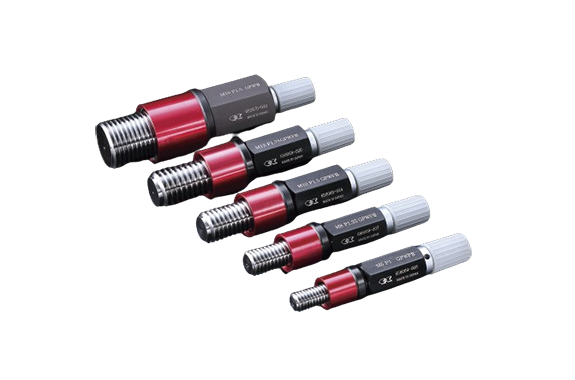
Made in Japan
Manufacturer: Eisen Co., Ltd.
Model: SPO Series
One-way thread gauge 2→1
About the Series

Conventional plug gauges measure GO and NO by two actions, but this allows measurement with one action, improving work efficiency. If the GO side thread plug gauge can be inserted smoothly and stops at the stopper end face, it is judged as pass.
The GO side is a guide, so erroneous judgment of the NO side can be prevented.
Features
- Comes with a detachable hex handle.
- The handle has a left-handed screw mechanism to prevent over-tightening.
- You can also remove the hexagonal handle and use it by holding the stopper (made of stainless steel).
- The material used is gauge steel (SK33, HRC58 or higher), which has excellent wear resistance.
- To ensure our customers’ trust and peace of mind, an inspection report is included.

How to use
If the GO side thread plug gauge can be inserted smoothly into the threaded hole and stops at the stopper end face, it is judged as pass.

Example of notation


| Thread Nominal | pitch | Threaded section L1 | Stopper part L2 | Stopper part φD | Hexagonal handle part L3 | Hexagonal handle part H | Gauge Type | Grade | |
|---|---|---|---|---|---|---|---|---|---|
| M1.4 | 0.3 | Regular | 3 | 6.5 | Four | 30 | Ten | GPIP GPWP GPNP | Ⅱ 6H [5H] |
| M1.6 | 0.35 | Regular | 3.5 | 6 | |||||
| M1.7 | 0.35 | Regular | |||||||
| M1.8 | 0.35 | Regular | |||||||
| M2 | 0.4 | Regular | Four | 7 | 7 | ||||
| M2.3 | 0.4 | Regular | |||||||
| M2.5 | 0.45 | Regular | 4.5 | 6.5 | |||||
| M2.6 | 0.45 | Regular | |||||||
| M3 | 0.5 | Regular | Five | 6 | |||||
| M4 | 0.7 | Regular | 7 | 9 | 8 | 40 | |||
| M5 | 0.8 | Regular | 8 | 8 | |||||
| M6 | 1.0 | Regular | Ten | 9 | Ten | ||||
| M7 | 1.0 | Regular | |||||||
| M8 | 1.25 | Regular | 12.5 | Ten | 12 | ||||
| M8 | 1.0 | Details | Ten | 12.5 | |||||
| M10 | 1.5 | Regular | 15 | 11 | 14 | 12 | |||
| M10 | 1.25 | Details | 12.5 | 13.5 | |||||
| M10 | 1.0 | Details | Ten | 16 | |||||
| M12 | 1.75 | Regular | 17.5 | 11.5 | 16 | ||||
| M12 | 1.5 | Details | 15 | 14 | |||||
| M12 | 1.25 | Details | 12.5 | 16.5 | |||||
| M14 | 2.0 | Regular | 20 | 12 | 18 | 17 | |||
| M14 | 1.5 | Details | 15 | 17 | |||||
| M16 | 2.0 | Regular | 20 | 12 | 20 | ||||
| M16 | 1.5 | Details | 15 | 17 | |||||
| M18 | 2.5 | Regular | twenty five | 13 | twenty two | ||||
| M18 | 1.5 | Details | 15 | twenty three | |||||
| M20 | 2.5 | Regular | twenty five | 13 | twenty four | ||||
| M20 | 1.5 | Details | 15 | twenty three | |||||
- *We can also manufacture special dimensions (fine, extra fine, unified, pre-plated settings, etc.).
- (Fine, extra fine, unified, helical insert, pre-plating setting, etc.)
Example of notation


| Thread Nominal | pitch | Thread gauge length K (specified in 0.1 mm increments) | Threaded section L1 | Stopper part L2 | Stopper part φD | Hexagonal handle part L3 | Hexagonal handle part H | Gauge Type | Grade | |
|---|---|---|---|---|---|---|---|---|---|---|
| M1.4 | 0.3 | Regular | 1.2 – 5.0 | K+ 3P | 6.5 | Four | 30 | Ten | GPIP GPWP GPNP | Ⅱ 6H |
| M1.6 | 0.35 | Regular | 1.4 – 5.0 | 6 | ||||||
| M1.7 | 0.35 | Regular | 1.4 – 5.0 | |||||||
| M1.8 | 0.35 | Regular | 1.4 – 5.0 | |||||||
| M2 | 0.4 | Regular | 1.6 – 7.0 | 7 | 7 | |||||
| M2.3 | 0.4 | Regular | 1.6 – 7.0 | |||||||
| M2.5 | 0.45 | Regular | 1.8 – 9.0 | 6.5 | ||||||
| M2.6 | 0.45 | Regular | 1.8 – 9.0 | |||||||
| M3 | 0.5 | Regular | 2.0 – 9.0 | 6 | ||||||
| M4 | 0.7 | Regular | 2.8–12.5 | 9 | 8 | 40 | ||||
| M5 | 0.8 | Regular | 3.2–12.5 | 8 | ||||||
| M6 | 1.0 | Regular | 4.0 – 17.5 | 9 | Ten | |||||
| M7 | 1.0 | Regular | 4.0 – 17.5 | |||||||
| M8 | 1.25 | Regular | 5.0 – 20.0 | Ten | 12 | |||||
| M8 | 1.0 | Details | 4.0 – 20.0 | 12.5 | ||||||
| M10 | 1.5 | Regular | 6.0 – 25.0 | 11 | 14 | 12 | ||||
| M10 | 1.25 | Details | 5.0 – 25.0 | 13.5 | ||||||
| M10 | 1.0 | Details | 4.0 – 25.0 | 16 | ||||||
| M12 | 1.75 | Regular | 7.0 – 30.0 | 11.5 | 16 | |||||
| M12 | 1.5 | Details | 6.0 – 30.0 | 14 | ||||||
| M12 | 1.25 | Details | 5.0 – 30.0 | 16.5 | ||||||
| M14 | 2.0 | Regular | 8.0 – 32.0 | 12 | 18 | 17 | ||||
| M14 | 1.5 | Details | 6.0 – 32.0 | 17 | ||||||
| M16 | 2.0 | Regular | 8.0 – 32.0 | 12 | 20 | |||||
| M16 | 1.5 | Details | 6.0 – 32.0 | 17 | ||||||
| M18 | 2.5 | Regular | 10.0 to 36.0 | 13 | twenty two | |||||
| M18 | 1.5 | Details | 6.0 – 36.0 | twenty three | ||||||
| M20 | 2.5 | Regular | 10.0 to 40.0 | 13 | twenty four | |||||
| M20 | 1.5 | Details | 6.0 – 40.0 | twenty three | ||||||
- *We can also manufacture special dimensions (fine, extra fine, unified, pre-plated settings, etc.).
- (Fine, extra fine, unified, helical insert, pre-plating setting, etc.)
Special Shaped Products
Simultaneous determination of screw hole concentricity

Thread and pilot hole measurement

Helical (planet) tap machining allowance measurement
 \
\
Calibration Procedure
Although the gauge part on the NO GO side only has two pitches, it can be disassembled and calibrated in the same way as a standard thread gauge.
No special tools are required for disassembly.
1. Remove the stopper.
2. Measure the go-through side with a three-wire gauge.
3. Measure the stop-through side with a three-wire gauge.
4. Attach the stopper.


