Japan, Kobata
Kobata DMH-01 Series Portable Digital Manometer
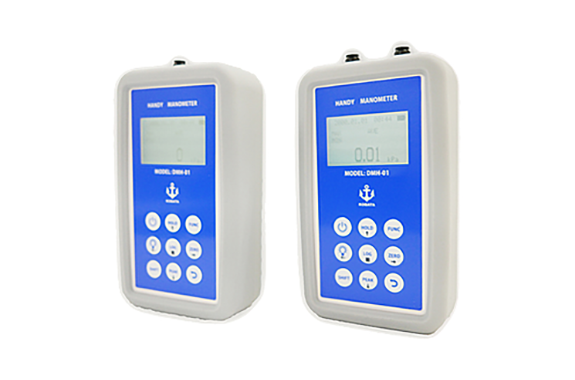
Made in Japan
Manufacturer: Kowata Keiki Seisakusho Co., Ltd.
Model: DMH-01 Series: DMH-01-4kP, DMH-01-10kP, DMH-01-40kP, DMH-01-100kP, DMH-01-1MP
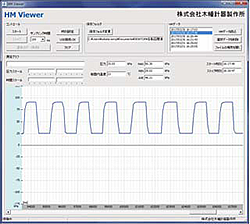
- By connecting with a USB cable, the DMH-01 main unit can be controlled from the included software, allowing you to measure while monitoring detailed waveforms of measurement data and record data to a PC.
- On-site measurements can be performed using only the DMH-01 main unit, and the data recorded in the main unit’s memory can be downloaded at high speed after measurement, allowing detailed data to be checked on a PC. Detailed analysis and processing can be performed using software, etc.
- It is now possible to set two threshold lines (red and blue).
- The saved data is in CSV format (tabular text file), so detailed analysis and processing can be performed using a spreadsheet program, etc.
- We provide separate Excel macros for displaying the Max, Min and Ave values for a specified section, as well as for unit conversion and flow rate measurement.
- This software is compatible with all DMH-01 series devices, so you can manage multiple DMH-01 series devices at the same time.
Optional Support
- Pressure connection ports can accommodate hoses of different diameters and medical luer taper fittings
- The measurement units are meters of water column and meters of mercury column for medical use, which are excluded from the Japanese Measurement Act.
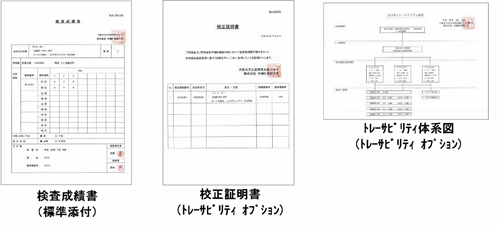
Inspection report, etc.
Model designation
| ① Measurement range | 125P: 0 to ±125Pa 1.25kP: 0 to ±1.25kPa (1250Pa) 4kP: 0 to ±4,000Pa (4kPa) 10kP : 0 to ±10kPa 40kP: 0 to ±40kPa 100kP: 0 to ±100kPa 1MP: 0 to 1,000kPa (1MPa) * For medical use only, we can manufacture models in older units such as cmH2O and mmHg. Please contact us regarding products with other measurement units for overseas use. |
|---|---|
| ② Additional specifications | TR: Traceability certificate issued (calibration certificate and system diagram) RF: Medical luer fitting type |
Optional items sold separately
A variety of peripheral options are available.
| Various pitot tubes | |
|---|---|
 | Using a Pitot tube makes it possible to measure flow rate. |
| Various fittings | |||
|---|---|---|---|
 |  | ||
| Reducer for different diameter tubes φ6 reducer Part number: 40445754 | Fluid piping side one-touch fitting | Branch Union Y | Bamboo Shoot Nipple Fitting |
| Various hoses | |
|---|---|
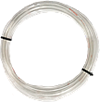 | We offer a variety of tube hoses with different diameters, lengths, and materials.Urethane tube φ4×2m Part number: 40445752 |
| Valves and Cocks | |
|---|---|
 | There are three-way cocks that release residual pressure on the secondary side of the cock , and two-way cocks that only open and close. |
 | Switching valveThis valve can switch between two flow paths. |
| Various fittings | |||
|---|---|---|---|
 | |||
| Rubber Pressure Pump | Manual Pressure Pump | U-Tube Manometer | Reference liquid column pressure gauge |
Standard accessories
- DMH-01 main unit x 1
- Protective silicone cover for the main unit x 1
- Urethane Tube Hose
- (Outer diameter φ4 x inner diameter φ2.5) 2m x 1 piece (The material of the tube for 1MPa is nylon. For differential pressure measurement, please cut it into two pieces.)
- USB 2.0 cable for PC connection (mini-B type (male) x A type (male)) x 1
- (The USB cable is for data transmission only and cannot supply power to the device.)
- Ferrite core magnet for the above USB cable x 1
- 2 AA alkaline batteries (for testing)
- Included software HM Viewer TM and manual CD-ROM × 1
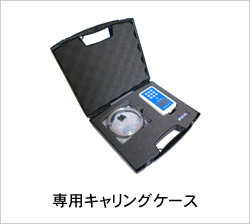
- Dedicated carrying case x 1
- Instruction manual, inspection report, warranty, calibration and repair request form x 1 each
External dimensions
| Model name | DMH-01 | ||||
|---|---|---|---|---|---|
| Model | DMH-01-4kP | DMH-01-10kP | DMH-01-40kP | DMH-01-100kP | DMH-01-1MP |
| Measurement range | 0 to ±4,000 Pa | 0 to ±10kPa | 0 to ±40kPa | 0 to ±100kPa | 0 to 1,000 kPa |
| Resolution | 1Pa | 0.01kPa | 0.01kPa | 0.1kPa | 1kPa |
| Display pressure unit | Pa | kPa | kPa | kPa | kPa |
| Product code | 11545515 | 11543517 | 11545518 | 11545519 | 1045520 |
| JAN code | 4560411140406 | 4560411140413 | 4560411140420 | 4560411140437 | 4560411140444 |
| Sensors | MEMS semiconductor sensor | ||||
| Measurement medium | Non-corrosive gases such as air, nitrogen, and oxygen | ||||
| Accuracy | ±0.5% F.S. (total error range after zero adjustment) | ||||
| Sampling interval | 10ms, 20ms, 50ms, 100ms, 200ms, 500ms, 1sec, 2sec, 5sec, 10sec, 30sec, 60sec, (12 steps) | ||||
| Display method | 4-digit 1.8-inch transflective LCD (with backlight on/off and 8-level brightness adjustment) | ||||
| Function | Records measurement data in the main memory, HOLD, minimum/maximum/average value, zero adjustment, auto power off, PC connection | ||||
| Operating environment | Temperature: 0 to 50°C, humidity: 35 to 85% (no freezing or condensation) | ||||
| Storage environment | Temperature: -20 to 60°C, humidity: 10 to 95% (no freezing or condensation) | ||||
| Pressure Connection Port | One-touch tube joint (tube outer diameter φ4mm) | ||||
| Built-in memory capacity | 16MB | ||||
| External connection terminal | Mini USB port | ||||
| Power supply | Batteries: 2 x AA alkaline batteries | ||||
| Case Material | ABS resin | ||||
| External dimensions | 76(W) x 135(H) x 35(D) / 81(W) x 141(H) x 42.5(D) (body only/with cover attached, excluding protrusions) | ||||
| Weight | Approx. 212g / Approx. 350g (Body only, excluding batteries / Including batteries and silicone cover) | ||||
| Operating system | Windows 7 or later Windows OS |
|---|---|
| CPU and memory | There is no disruption to the operation of the OS being used. |
| Required hard disk space | The software itself is 3.3MB plus the capacity required to record measurement data. |
| display | A resolution of 800×600 or higher. |
Related Products
-
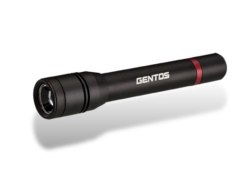
Gentos REXEED Series RX-032D Flashlight (370 lumens)
-
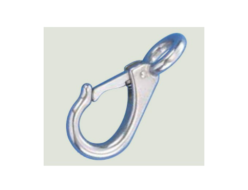
Kondotec B Type Hook Rigged Eye Snap
-
Sanritsu Electric JA300 Color Joint Series
-
NDV Sanitary type damper for discharging tablets Sanitary valves
-
Okazaki Seiko SHE6LH OK-HARD Coated Solid Carbide Hard Square Endmills (Long Shank, 6 Flutes)
-
Watanabe TSS [Sheath RTD with terminal box] Spring Crimp Type with Terminal Box


